Course DescriptionsMini UnitsThese will be 1-2 day lessons taught intermittently during other units.
|
Advanced SectionAfter the Who I Am unit, you are welcome to follow along with the IP units or develop a personal art investigation series.
|
Note: order and units may change throughout the year to better meet needs of classes and students. Content will be linked above as it is finalized. Check the Class Blog to keep up with what is due when.
Unit 1: Who I Am
Project Description: create a French Fold Booklet and a Spark Video to show what makes you, well you!
Objective: share some things about your self, demonstrate current art-skill level and creativity, learn how to navigate and submit assignments on Canvas.
Goals: get to know each other better, practice submitting assignments, and understand what to expect from the class.
Materials: Paper, pencil, ink beyond that you're welcome to use any art supplies you have access to. If you want to challenge yourself only use paper and ink.
|
*submit progress images and/or notes to Daily Work assignment on Canvas by end of class; after 11:49 pm they will be marked late.
|
Unit Time Line
Day 1: introduce project and start on moquette*
Day 2: Compete Moquette and start on Project* Day 3: Complete Project start Spark Video* Presentation Day 4: Upload Images and video of project to the "Who I Am Formal" Canvas Assignment by end of class. |

Cup Unit
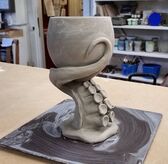
Cup Project 1Beginning and Intermediate: Make 1 footed cup with a handle.
Proficient and Advanced: Make Set of 3, footed cups with a handles. Goal is uniformity (practicing manufacturing the same cups) 1. Create a diagram that shows the anatomy of a cup. 2. Then watch the videos below to get an idea of the different ways to make a cup. (hint, change the speed they play at if you want to get through them faster) 3. Make your cup! |
|
Notes before starting:
- You don't have to have all the cool tools these people have to make cup- just be creative with what you have!
- work slabs with a plastic bag under them so they don't stick to your surface.
- NEVER pick up greenware by the lip or handle- THEY WILL BREAK IF YOU DO. instead pick up using 2 hands on outside of the project. This increases the surface area and spreads out the force so you're putting less pressure on your cup.
- PICK UP GREENEWAR WITH EXTREME CAUTION- see number 3.
|
|
|
|
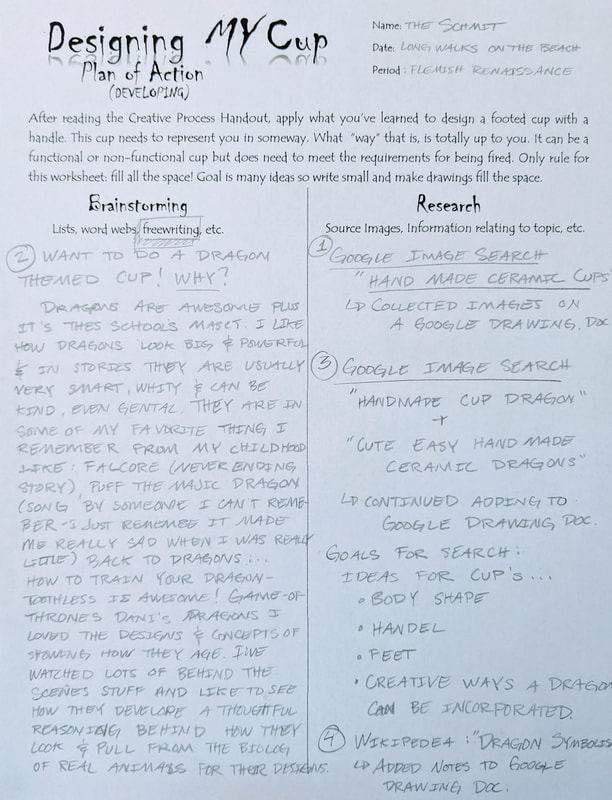
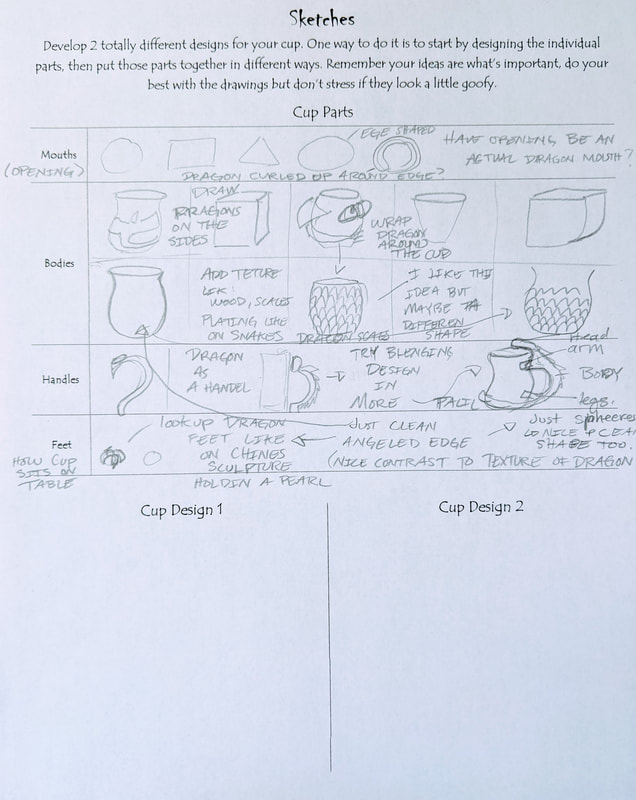
Cup Project 2- Designing YOUR Cup

|
|
|
Project RequirementsBeginning and Intermediate build 1 (will grade best one, plus you'll have a backup in case one breaks)
Proficient-Advanced: build a set of 3 (will grade best 2, but you'll want backups incase they break) Goal: Design and build YOUR cup.
Objective: understand and apply design process to create a footed cup with a handle that's something more than just a simple cylinder with a loop for a handle.
|
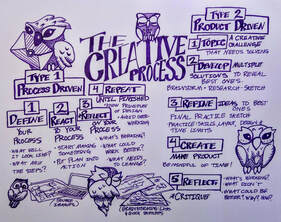
Understanding Design ProcessCup 1 was following Type 1, the process driven process. You focused on just following the basic skills needed for making a cup. Cup 2 will follow Type 2, and focus product driven and is going to be focused on really thinking about the design of your cup and how best to set yourself up for success.
|

Step 1: Plan of Action
(Pre-project stuff)
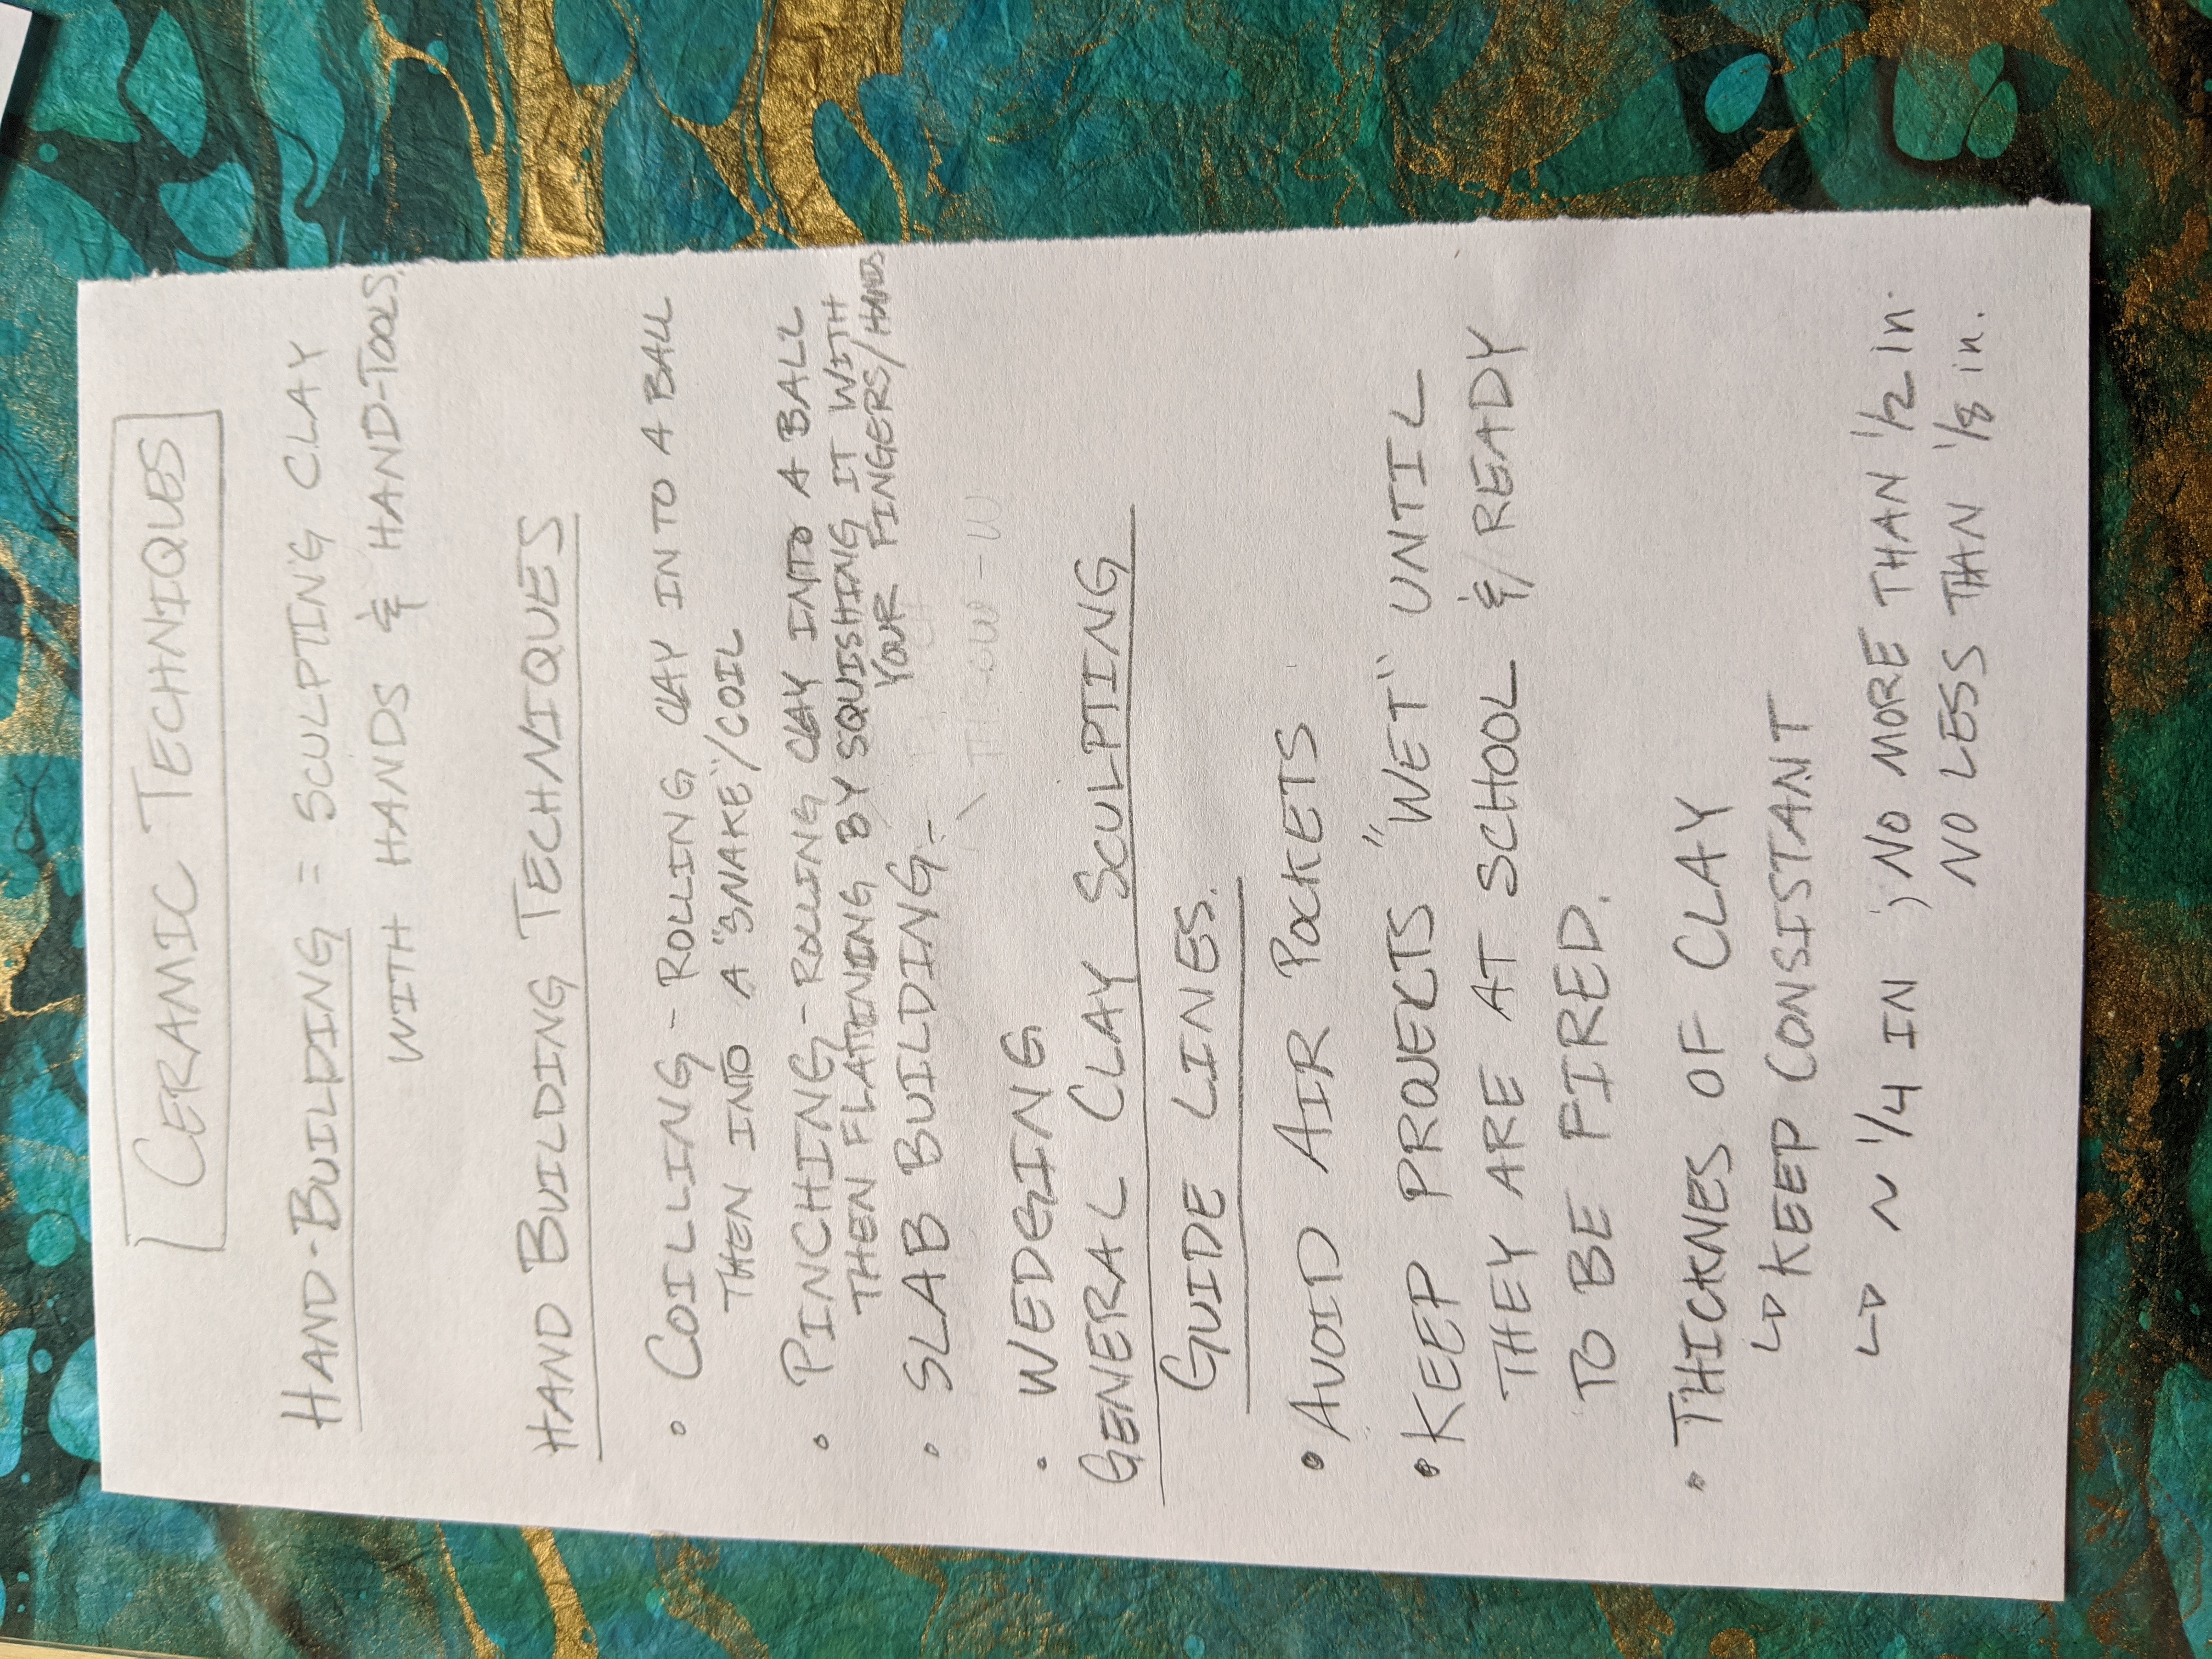
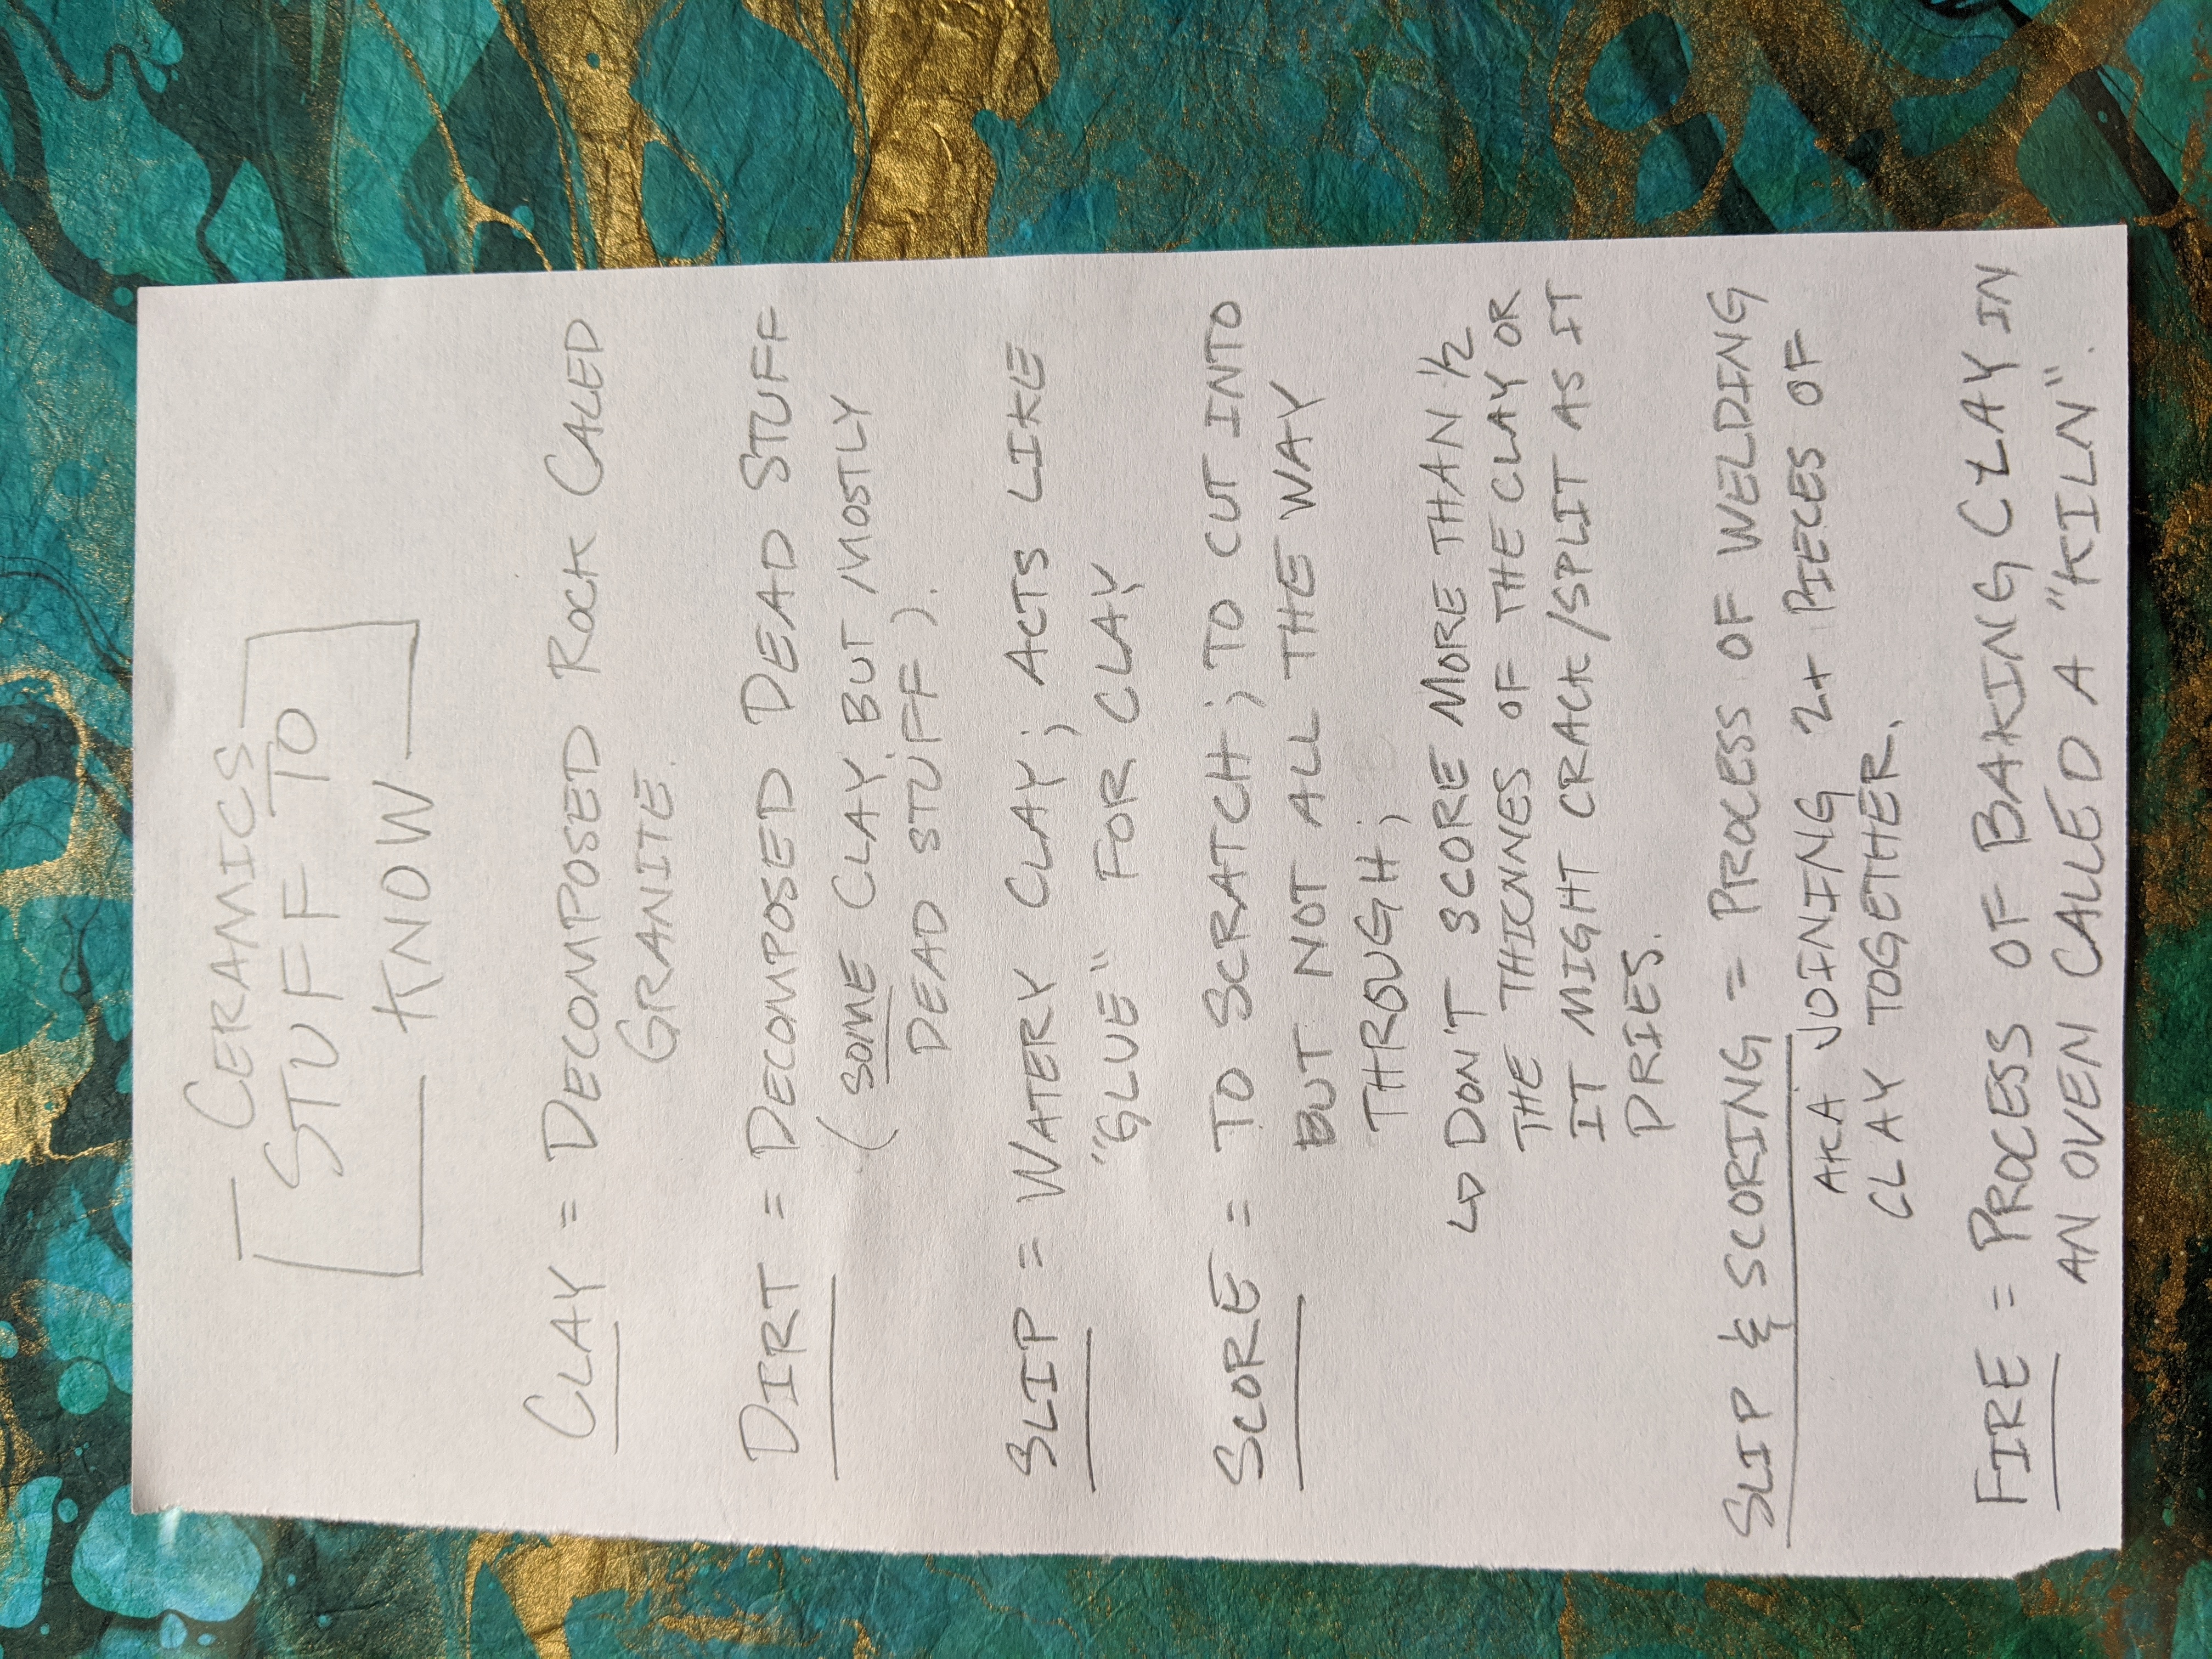
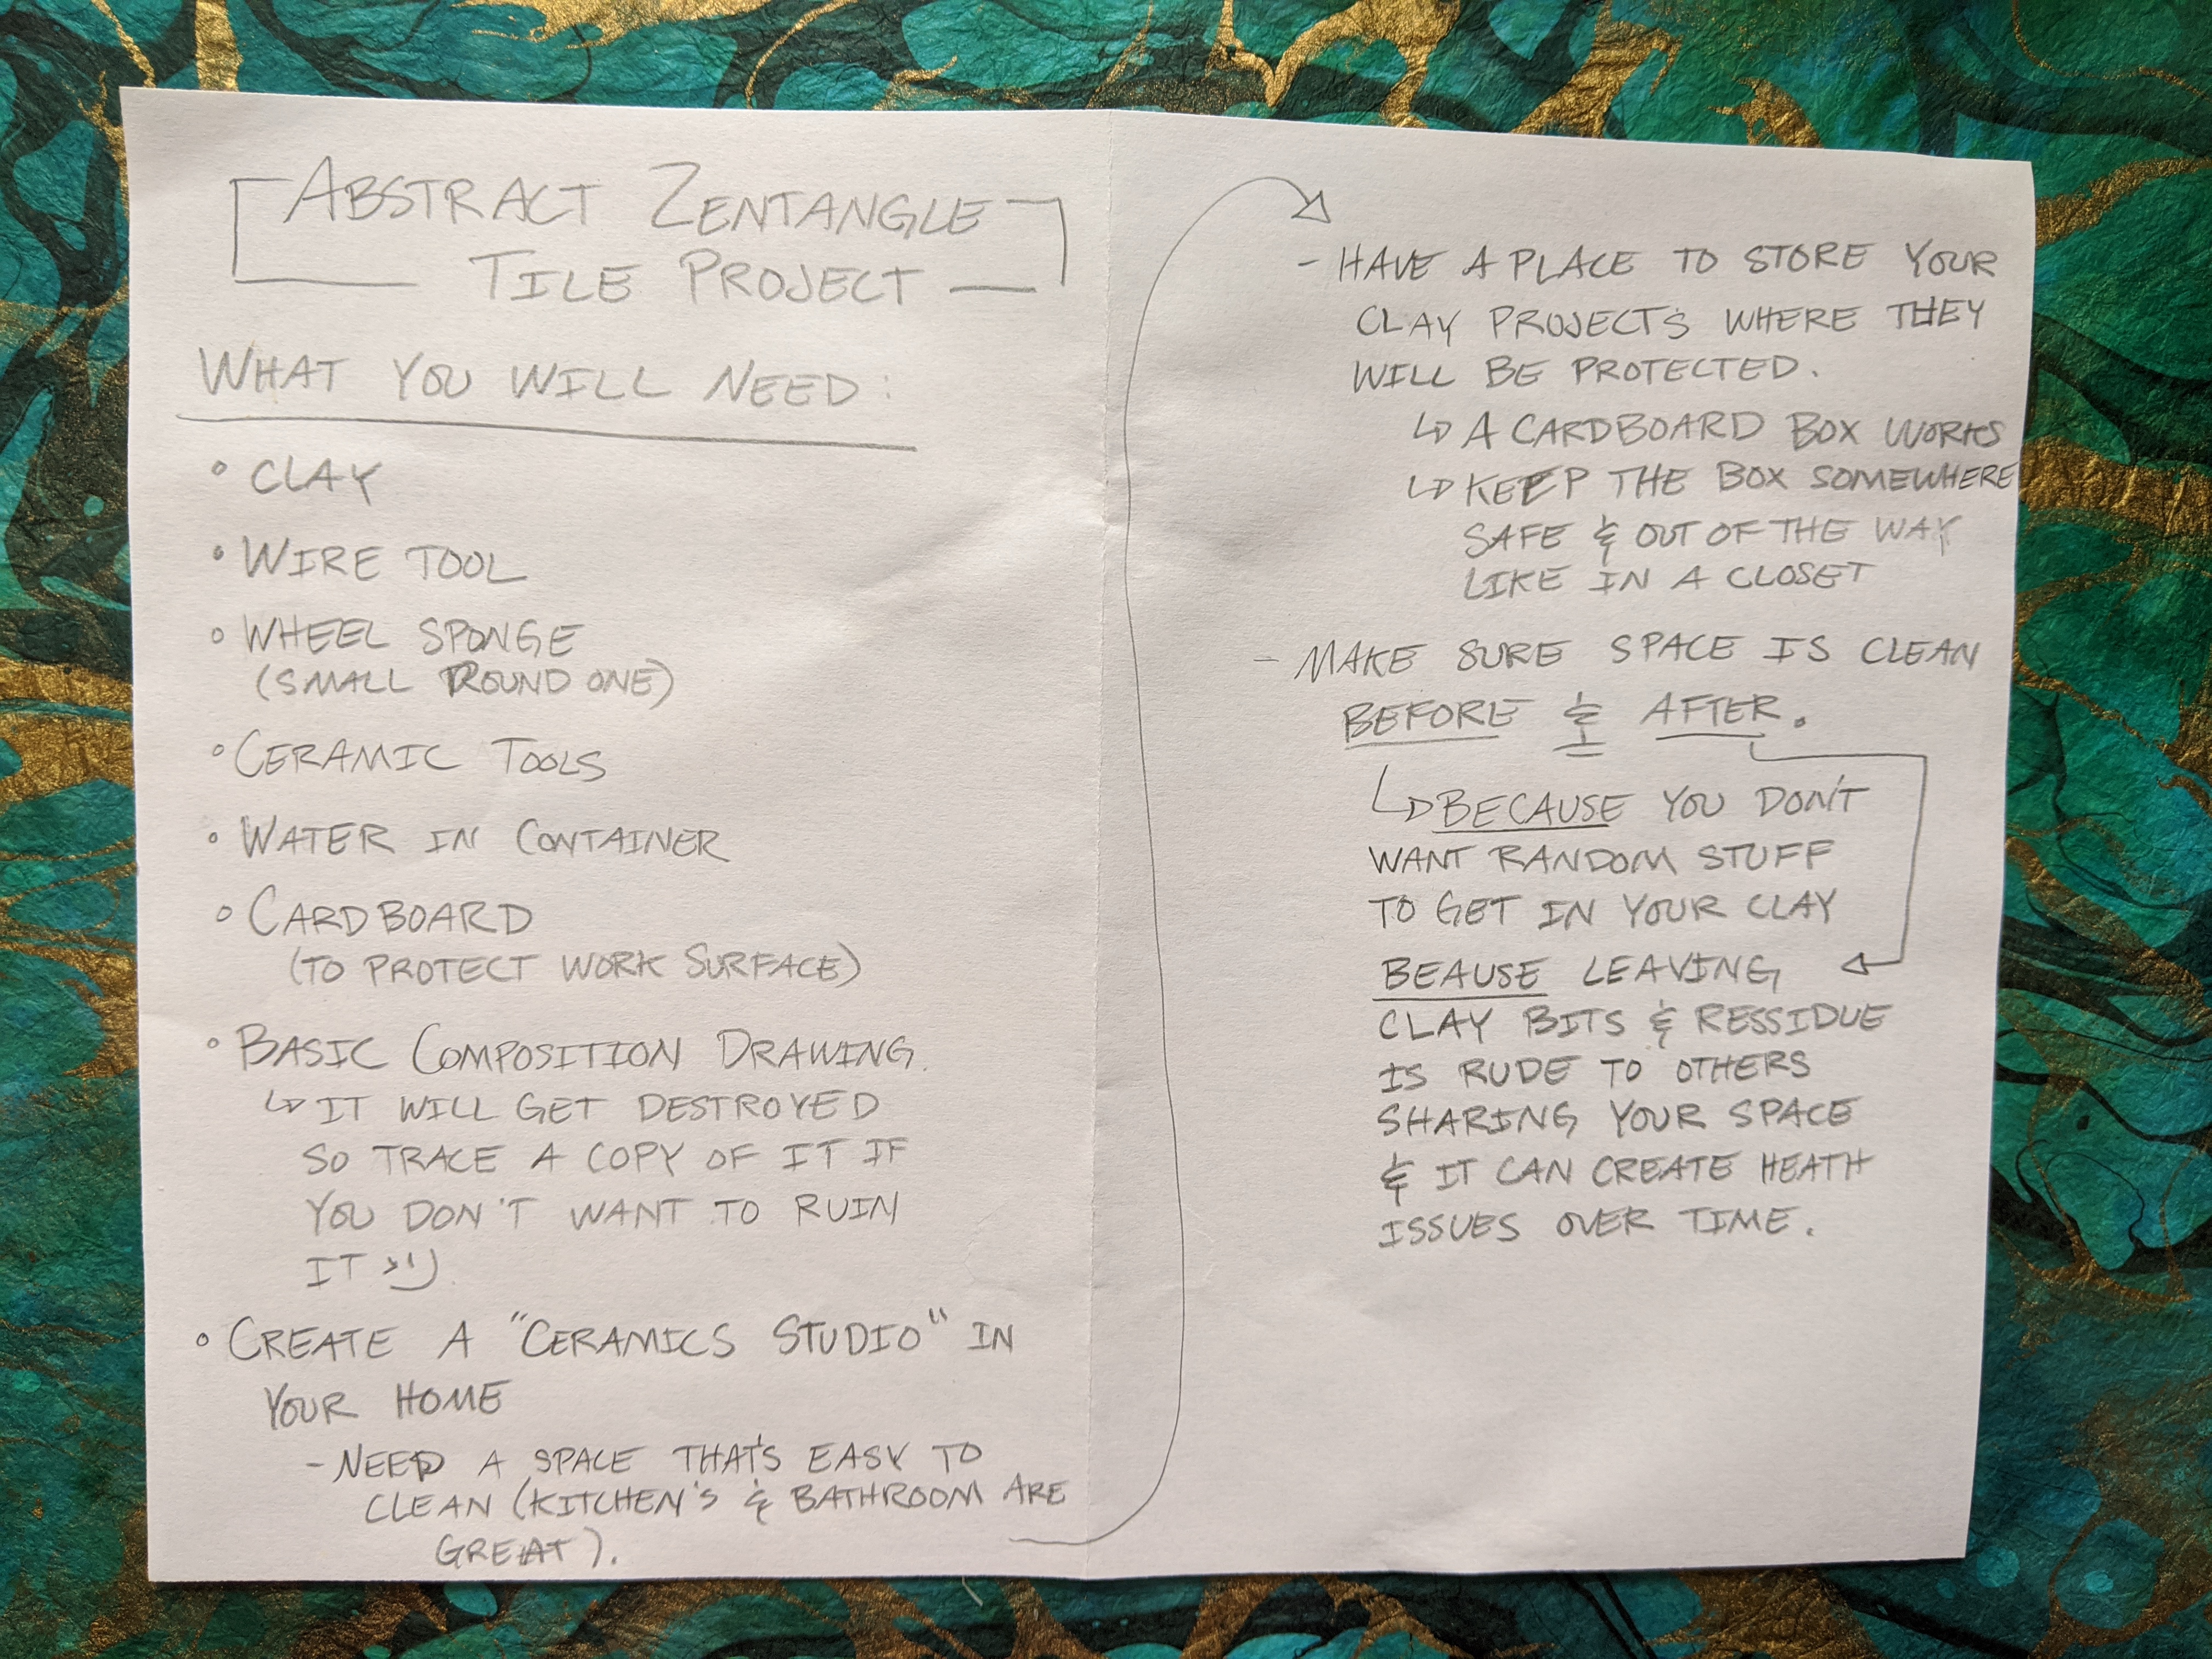
Zentangle Project
|
Goals
|
Art and Class Supplies Information
|
Here is a list of supplies you need to get:
Here are the supplies in your Art Kit:
|
Here is a list of other supplies you will want too:
|
Photo from Nirmala | നിര്മ്മല
